Getting Started
The easiest way to get started is to download the latest release builds from the GitHub repository.
Team Server
The Team Server, teamserver-linux.zip, is only built to run on Linux.
~$ wget -q https://github.com/rasta-mouse/SharpC2/releases/download/v1.0.0/teamserver-linux.zip
~$ unzip -q teamserver-linux.zip -d SharpC2
~$ cd SharpC2/
~/SharpC2$ chmod +x TeamServer
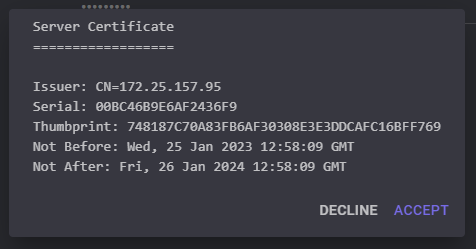
Run the TeamServer executable, providing the IP address of the server and a shared password to connect with. The IP is used to generate a self-signed SSL certificate for the management API.
~/SharpC2$ sudo ./TeamServer 172.25.157.95 Passw0rd!
Certificate thumbprint: 748187C70A83FB6AF30308E3E3DDCAFC16BFF769
Client
Only a Windows build, client-windows.zip, is provided at this time. It is built as an MSIX package which you must install.
PS C:\Users\Daniel\Desktop> iwr -Uri https://github.com/rasta-mouse/SharpC2/releases/download/v1.0.0/client-windows.zip -OutFile client-windows.zip
PS C:\Users\Daniel\Desktop> Expand-Archive -Path .\client-windows.zip -DestinationPath .
PS C:\Users\Daniel\Desktop> cd .\Client_1.0.0.1_Test\
PS C:\Users\Daniel\Desktop\Client_1.0.0.1_Test> .\Client_1.0.0.1_x64.msix
The installer is signed with my own key. Should you want to build with your own key, see the Building page.
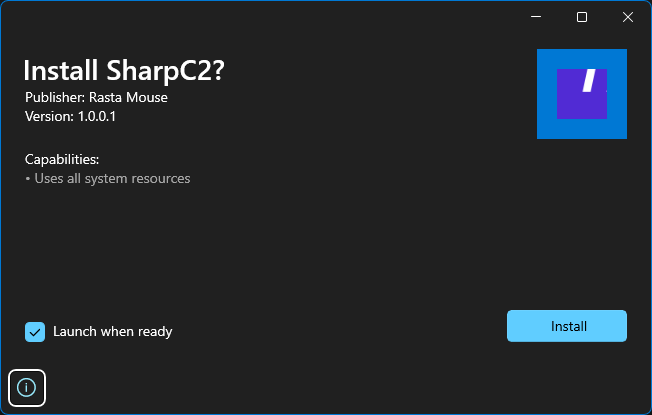
After installation, the app will appear in your Start Menu, just like any app from the Windows Store.
To connect to the Team Server, enter its IP address, a nick for yourself, and the shared password.
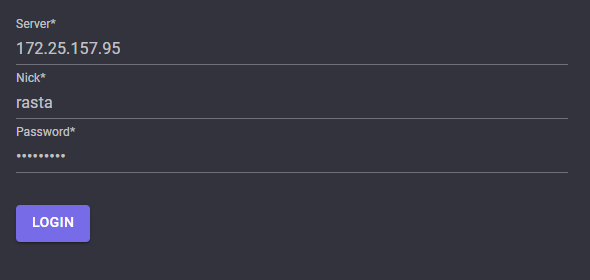
Ensure that the certificate thumbprint matches the console output of the Team Server.